“`html
Making Your Solo Recording Sessions Shine with the Best Room Sound
Key Ways to Make Your Room Sound Great
Make pro-level sound by getting the right echo time of 0.3-0.4 seconds. Put bass traps in room corners and keep a 70:30 soak-up to spread ratio to have clear sound for solo acts.
How To Set Your Microphone
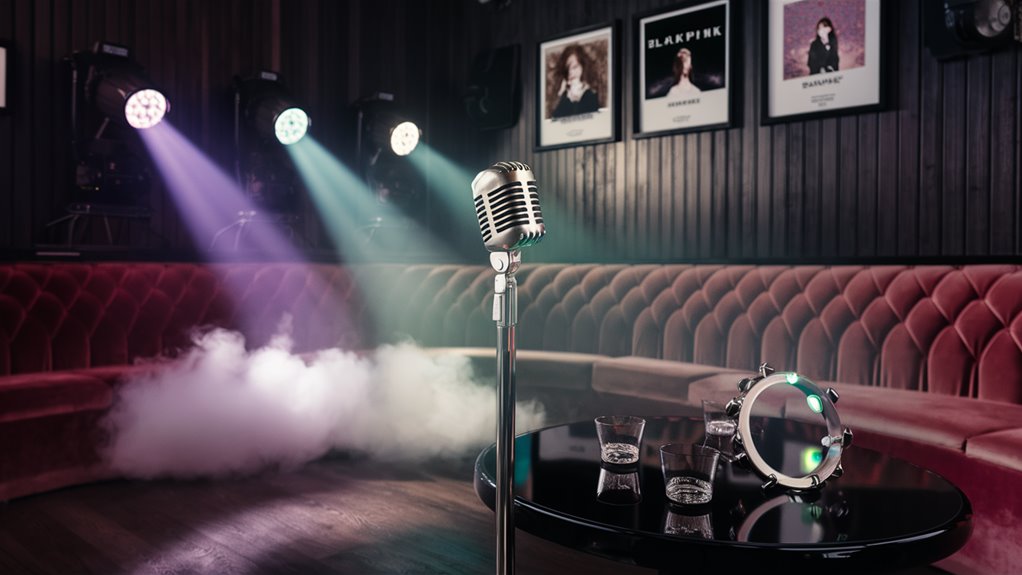
Place your big mic 6-12 inches away, at a 45-degree angle down for the best sound catch. Add a back mic 3-6 feet away to bring real room feel to your sounds.
Getting Your Sound Levels Right
Keep clear sound with right gain levels at -18dBFS and use soft 2:1 squeeze. This setup lets the sound play well with room echoes to give a rich, studio feel.
Smart Room Setup
- Good spot for sound soaking stuff for even sound
- Clever mic spots for best sound catch
- Pro-level gain setup
- Managed room echoes for real feel
- Exact squeeze settings to keep sound in check
Putting these parts together builds a top recording space that lifts solo acts with top sound depth and feel.
Key Points on Room Sound and Control
Knowing Room Sound for Pro Recording
Room sound shapes how good a sound setup can be. To create a pro sound space, sound control is key, with a focus on early echoes and sound loops.
Must-Measure Room Sound Parts
Start by checking room size and noting parallel sides. Measuring echo time with sound tools is key – good levels are between 0.3-0.4 seconds for voice work in small spaces.
Smart Placing of Sound Control
Handling Low Sound and Soaking
Bass traps are first, put in corners for best effect. Wide band soakers should go at key echo spots, like side walls, top, and back. The mirror move helps find key soaking spots – check where the mic reflects from where you stand.
Spreading and Balance
Sound spreaders on the back wall keep the room feeling real while managing echoes. A good mix of soaking and spreading often sticks to a 70:30 balance, setting up a spot that melds controlled sound with real vibes.
Key Sound Control Bits
- Bass traps for low sound control
- Wide band soakers at echo points
- Spread panels for room feel
- Sound tools for exact setup
- Smart placing with the mirror move
Picking the Right Microphone
The Full Guide to Choosing the Right Microphone
Key Points in Picking a Microphone
Choosing a mic is key to good sound work. This step needs a careful look at key mic details and matching these to your sound needs.
Best Mic Types for Different Uses
Big mic models like the AKG C414 and Neumann U87 are great for voice work, catching a full range of sounds with sharp detail up high. For recording tools, small mics give great fast sound catch and clear stereo sound.
Choosing Mic Designs and Room Sound
Mic shapes change how sound is caught based on room sound. Heart shapes work well in basic rooms by keeping out unwanted echoes. All-around shapes are good in sound-treated rooms, catching real room feels while keeping the main sound clear.
Main Mic Details and Performance
Key mic details cover sensitivity and self-noise. Pro recordings need max sound level handling right for the sound type, while keeping self-noise under 15dB. Quick sound response needs to fit with the range and speed needed for good sound copying.
More Ways to Pick
- Sound source type
- Room sound feel
- Max sound level needs
- Low noise details
- Range of frequency needed
- Options in mic shapes
- Quick sound catch ability
Smart Mic Setting
Guide to Smart Mic Setting
Knowing Sound Source Spots
Right mic setting is key for top-quality sound work. Getting the right mic builds a base, but smart setting picks the final sound feel.
Voice Recording Moves
To catch voices best, find the main sound spot. Set the mic just above nose height, tilted down at a 45-degree angle to cut sharp ‘p’ sounds. Keep it 6-12 inches away, changing as needed based on the mic’s effect and room sound.
Recording Tool Sounds
Finding the best spot for tool sounds needs care for sound balance. For guitar sounds, aim the mic 6-8 inches from where the neck meets the body. Adjust the spot while listening through headphones to hit the best mix of string sound and body fullness.
Handling Room Sound
Managing room echoes matters in mic setting plans. In simple rooms:
- Set mics close to sound sources
- Use sound control thoughtfully
- Put up sound blockades to cut unwanted echoes
- Try different mic spots
- Check for sound clarity and depth upgrades
Small changes in setting can bigly better sound quality, tone balance, and full sound feel.
Making Real Room Feel in Sound
Pro Tips on Real Room Feel in Sound
Smart Mic Places for Depth
Real room feel comes from smart mic places that catch both straight sound and managed room echoes. Place the main close mic 6-12 inches from the sound, with a back mic 3-6 feet away to make real space feel without too much color.
Sound Control and Room Feel
Smart sound control matters in making room feel. Put soak-up panels at first echo spots while keeping some reflective sides for real vibe. The right space ratio between close and room mics sets up a perfect mix of straight sound and space depth.
More Moves with Multiple Mics
For more space feel in live room spots, use a three-mic setup by adding a far mic near walls or corners at lower gain. This setup gets subtle room vibes for more sound control in mixing. Keep phase fitting right through smart polar pattern lining and exact time setting up front. The end sound is a three-deep stage that truly shows both tool sound and room feel.
Set Up Your Sound Work Line
How to Set Up Your Sound Work Line Well
Must-Have Sound Path Bits
The right sound work line forms the base for top-quality sound catch. A well-set sound path keeps the real feel of your source and gives clear sound.
Main Sound Path Setup
Start by linking your top-mic to a pro preamp, using exact gain levels to keep signal clean. Put a squeeze next using a 2:1 rate with even in and out times for quiet sound control.
Clever Processing Spots
Set a tune adjuster after the squeeze when getting voice or tool sounds. Make needed tune changes before digital change. The analog-to-digital change bit (ADC) should take signals around -18dBFS to keep the best space and detail.
Watch Path Setup
Make a two-path system:
- Clean sound line for uncolored catch
- Watch path with low-delay effects
- Pro watching through studio earphones or close speakers
- Real-time sign check ability
This plan makes sure of clear sound catch and gives the people making the sound a good listening time.
Big Moves in Sound Flow Work
Watch the full sound work line through top-level watch systems for sure assessment. Set right gain levels all through to keep the best signal-to-noise level and stop unwanted bits.
“`